Stop Recoil Anticipation, Blinking, & Flinching While Shooting
Identify & fix recoil anticipation, blinking, and flinching with two simple drills.

Recoil anticipation is when a shooter pushes the down to counteract the gun’s recoil before the shot has actually been fired. This is very common amongst new shooters, and it can happen with rifle or pistol – though it’s more common with pistol shooting. Recoil anticipation results in low hits and is difficult to fix unless you’re paying attention to what’s going on.
Blinking and flinching while shooting is similarly common, if not more common. It manifests as the body jerking and jumping when the shot breaks. It’s a natural reflex – we’re controlling an explosion just in front of our face after all.
The more a shooter practices without addressing anticipation or flinching, the harder it is to fix. Nip this bad habit in the bud early.
I will talk about recoil anticipation, flinching, and shooting in the context of practical pistol shooting – though the principles apply to all forms of firearms shooting, be it rifle, shotgun, or even precision rifle shooting.
Diagnosing anticipation and flinching
Some time ago, I took a friend of mine to the shooting range for her second range trip ever. I had the opportunity to take her to the range for the first time, and was fortunate enough to be able to bring her on her second trip. Like many new shooters, she was anticipating her shots and hitting low with a pistol.
During this range trip, my friend started to show frustration for her low hits. So I had her drop the magazine, empty the gun, and pull the trigger again. Clear as day, her muzzle moved downwards in anticipation of the non-existent recoil. I asked her if she saw that and she hadn’t, so I had her do it again and to pay close attention to the front sight of her handgun. This time she saw it.
It’s impossible to identify any recoil anticipation or flinching if the shooter is blinking every shot. By eliminating the explosion and recoil, it’s easier to keep the eyes open and see what happens to the sight.
Dry fire at the range is an excellent way to work on this. I had her dry fire the handgun a dozen or so times before loading up another magazine. Her next live fire rounds were much closer to the center of the target before.
After identifying the trigger pull issue, the next step is to work on smoothing out that trigger pull. It can be done in live fire, but dry fire practice is the cheaper way to work on this.
Maintain a neutral grip
Recoil anticipation is sometimes unintentional, but often new shooters will actively strive to push the handgun down to lessen the muzzle flip in recoil. This is why it’s called “recoil anticipation” – the shooter anticipates the recoil and actively strives to push the muzzle down. But a bullet will leave the barrel in under 0.002 seconds – that is much faster than we can react and actively push the muzzle down to keep the pistol from flipping upwards in recoil – so don’t bother trying to fight recoil.
This is where a neutral grip comes into play. We don’t want to anticipate the shot, we want to simply observe the shot. Let the gun recoil and maintain a firm neutral grip holding the gun in place. Those activated muscles will force the gun to return to the point of aim without having to actively push back down.
Smooth trigger pull
The next part of avoiding recoil anticipation or flinching is a smooth trigger pull. If in pulling the trigger we yank the gun in any direction, shots will miss. Since there’s an explosion and recoil right in front of our face, it can be difficult to notice the deviation of the sights without having a high level of visual skill to watch the sights lift and return.
The trigger pull must travel smoothly straight back. This requires an even pull weight that goes straight to the frame of the gun.
A common way to start training this is with the “surprise trigger break.” It’s a bit of old advice, but it can help when starting out. Slowly move the trigger straight back so the shot surprises you. Can’t anticipate recoil or flinch if the shot is a surprise! This can help when starting out, but eventually it must be abandoned in favor of faster trigger pulls.
Live fire drills to fix anticipation and flinching
A great way to train away anticipation and/or flinching is to blend live fire and dry fire. Load one round into the gun or put a dummy round in the magazine as the second round. The first shot will obviously send a bullet down the range, but the second shot will be a dry fire shot. Any anticipation or flinching will be incredibly obvious as the sights jump around – there’s no recoil do mask the jerked trigger.
This immediate contrast between live fire and dry fire will help identify trigger control problems as well as illustrate potential issues with trigger control.
Pay attention to what happens with the pistol’s sights. Does the front sight (or red dot) jump around any? If so, focus on getting a smooth trigger pull straight back. For the dry fire shot, the front sight should not move.
Dry fire drills to fix anticipation and flinching
Dry fire practice is one of the most useful components of firearms training, especially when it comes to avoiding recoil anticipation as well as flinching. When dry firing, there is no recoil to worry about, which makes it easy to focus on building good habits. The key is to dry fire like it is live fire. Maintain a firm grip so when there is recoil, the firm grip is there to reduce the recoil.
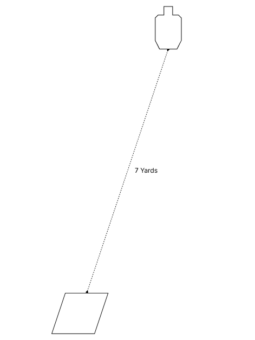
Trigger Control at Speed is my favorite drill for working on a quality trigger pull. This drill works in live fire or dry fire, but it’s awesome for dry fire. It’s possible to put a lot of imaginary rounds down range in short order – for free. Starting every training session with some trigger control at speed is an excellent way to get rid of recoil anticipation and flinching.
Keep training and keep analyzing
“Practice does not make perfect. Perfect practice makes perfect.” -Vince Lombardi Jr.
Unfortunately we cannot truly practice perfectly. If we practiced perfectly, then we’d be perfect. All we can do is strive to practice technique to the best of our ability through deliberate practice.
Casually flinging a hundred rounds down range isn’t true training – it’s more like entertainment. Training comes from intentionally working on specific skills and analyzing performance while training.
Don’t just turn money into noise – train with intention.
Further Training with:

Accuracy at Speed, Trigger Control
Trigger Control at Speed
Written by Brian Purkiss - always a student, sometimes a teacher.
I don't consider myself a competition shooter - I think of myself as a performance pistol shooter. I am all about performing at as high of a level as possible. Towards that end, I am obsessive about learning how to perform. I spend a lot of my life learning from the best across the entire firearms world and even into other areas of performance and other sports. I am a USPSA Carry Optics Grandmaster, currently working towards my second GM title in the Open division.
Want more? Follow on Instagram, Facebook, or Email.
|
